Outlook 2013
Do you want to setup your email for Outlook 2013? Follow our simple step by step guide today and get your email setup in Outlook 2013.
Step 1
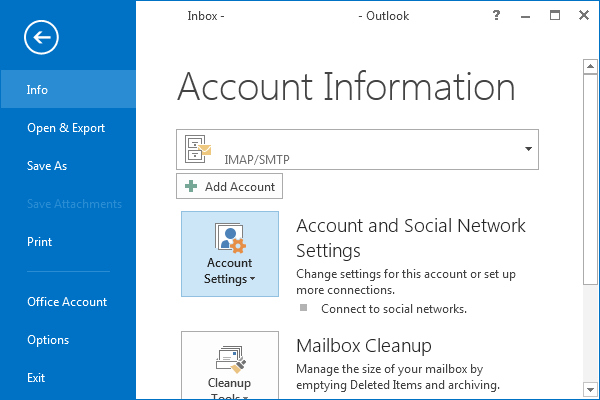
In the Microsoft Outlook 2013 top menu go to File.
Step 2
Click + Add Account.
Step 3
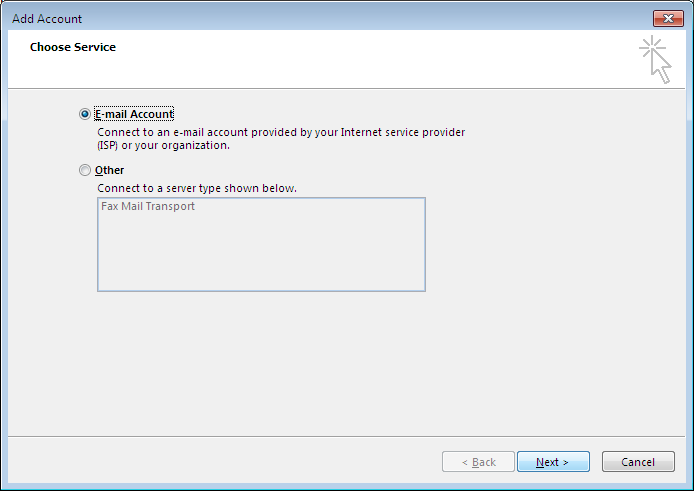
Make sure the type E-mail Account is selected. Click Next.
Step 4
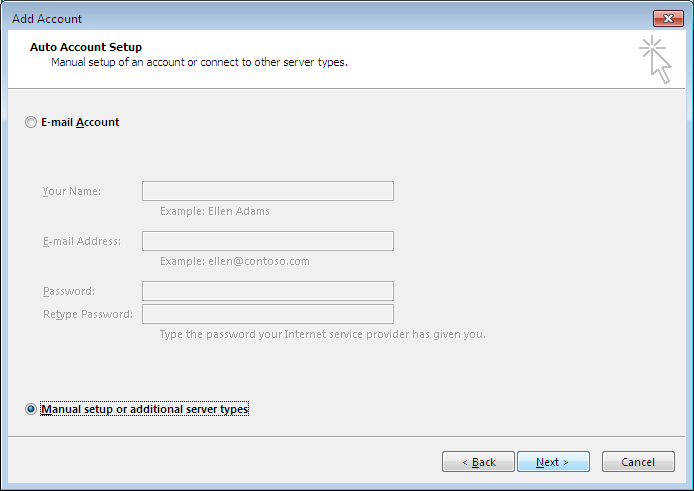
Select ‘Manual setup or additional server types’. Click Next.
Step 5
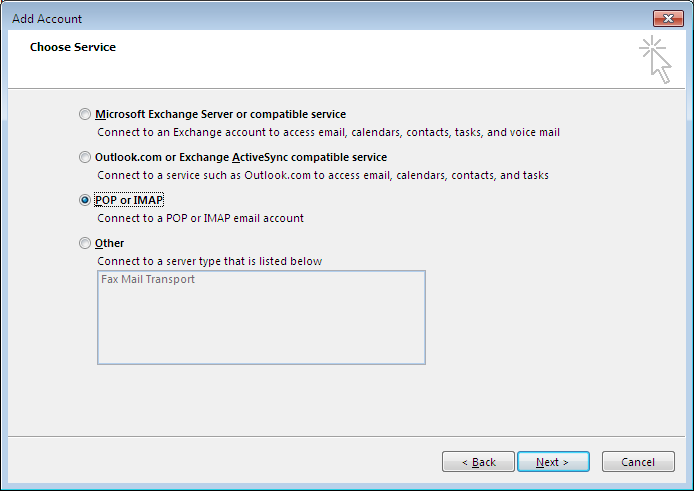
Select ‘POP or IMAP’. Click Next.
Step 6
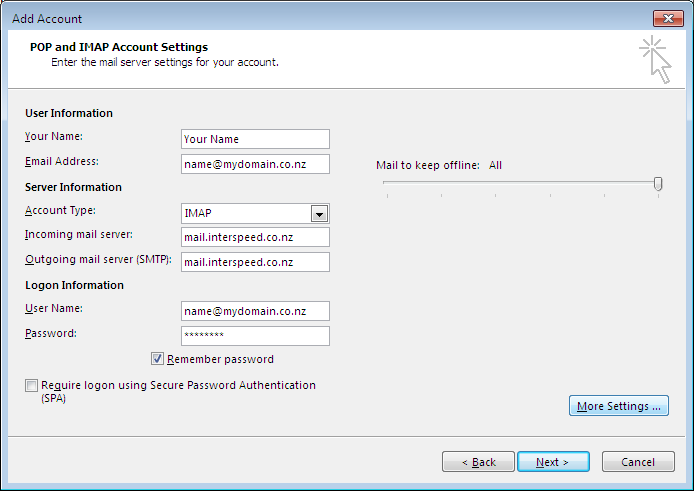
Enter Your Name, Email address. Select an Account type TOOLTIP: IMAP – Email is kept on our mail server. This is best if you are setting up this email account both at the office and at home. POP3 – downloads all the new messages from the mail server to yo
Step 7
Click on the Outgoing Server tab > Tick ‘My outgoing server (SMTP) requires authentication’, Click Advanced.

Step 8
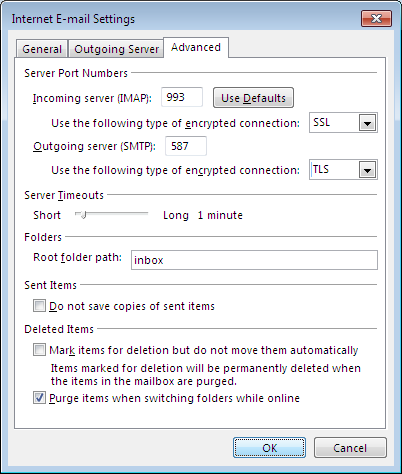
Next to “Use the following type of encrypted connection”, Select SSL from the drop down menu. Then under the Outgoing server select TLS. Manually enter “587” as the Outgoing Server (SMTP) port. The default Incoming port can be left (if using IMAP it will
Step 9
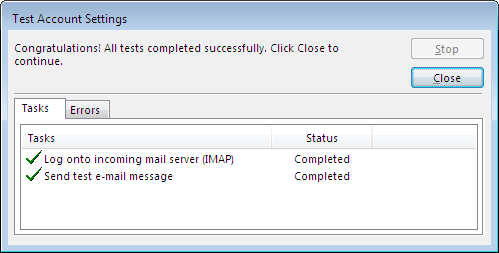
Click Next on the account settings screen. All tests should hopefully complete sucessfully. Once completed click Close.
